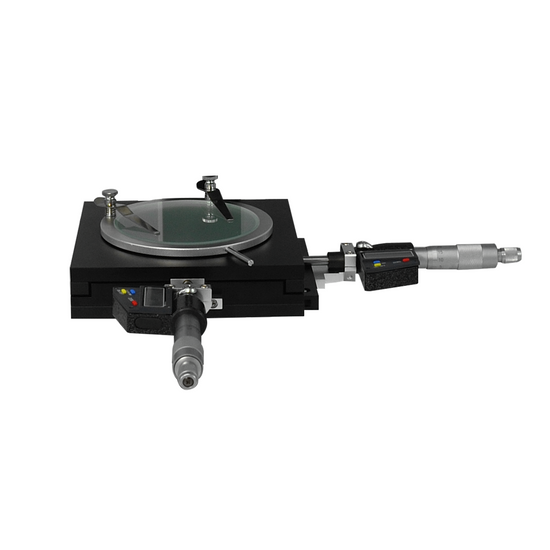
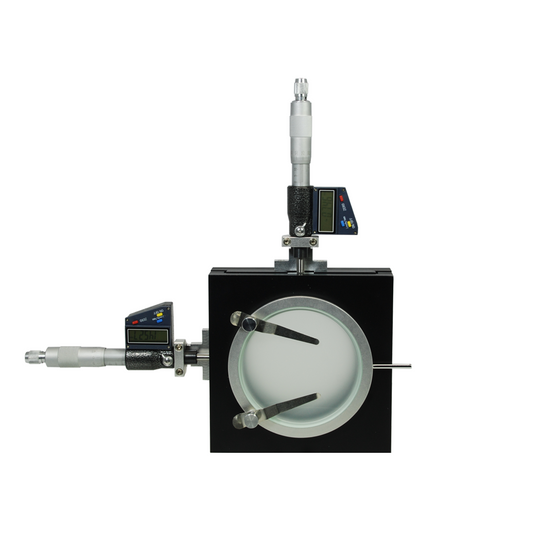
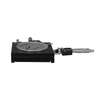
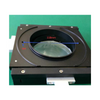
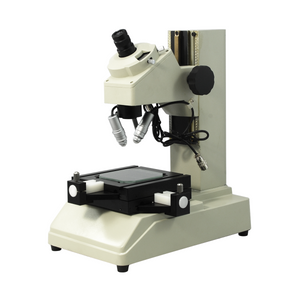
- The XY Mechanical Stage for measurement microscope systems provides a total of 2x2 (50x50mm) inch travel in the X and Y directions.
- When the stage is centered, a total of 2 inches (50mm) of travel can be achieved, meaning 1 inch (25mm) to any side.
- The hole in the center of the stage allows bottom lighting to shine through, diffused by a matte glass stage plate cover.
Quick Overview
XY Stage Travel Distance: 2x2 in. XY-Axis Drive Mode: Manual. Stage Platform Dimensions: 150x150mm. Stage Height: 36mm. Stage Backlight Window Size: Dia. 90mm. XY-Axis Measurement Mode: Micrometer. XY-Axis Resolution: 1μm. Number of Stage Clips: 1 Pair. Digital Micrometer Head Measurement Range: 0-25mm (0-0.984 in. ) . Digital Micrometer Head Resolution: 1μm.
MS05811202 2x2" XY Manual Measurement Stage (with 2 of Digimatic Micrometer Head)
XY Measurement Stage
| XY Stage Travel Distance | 2x2 in. |
| XY-Axis Drive Mode | Manual |
| Stage Platform Dimensions | 150x150mm |
| Stage Height | 36mm |
| Stage Backlight Window Size | Dia. 90mm |
| XY-Axis Measurement Mode | Micrometer |
| XY-Axis Resolution | 1μm |
| XY-Axis Measurement Accuracy | 0.001mm |
| Micrometer Head Mount Size | Dia. 12mm |
| Stage Bottom Mounting Size | Dia. 95mm |
| Number of Stage Clips | 1 Pair |
| Surface Treatment | Black Oxide Finish |
| Material | Metal |
| Color | Black |
| Net Weight | 2.10kg (4.63lbs) |
Digital Micrometer Head
| 25mm Digimatic Micrometer Head | |
| Digital Micrometer Head Measurement Range | 0-25mm (0-0.984 in. ) |
| Digital Micrometer Head Resolution | 1μm |
| Digital Micrometer Head Accuracy | 0.001mm |
| Digital Micrometer Head Spindle Diameter | Dia. 8mm |
| mm/inch Conversion | Yes |
| Zero-Setting | Yes |
| Data Output | Yes |
| Digital Micrometer Head Power Supply Type | Battery SR44 1pc |
| Surface Treatment | Polished Chrome |
| Material | Metal |
| Color | White |
Technical Info
Instructions
Microscope StageClose Λ
| Microscope stage is usually located under the objective lens of the microscope to place the object to be observed. Usually, it is equipped with mechanical motion devices, and is moved and positioned in XYZ three directions or rotates or tilts around the Z axis and other functions. Microscope stage usually has a function of moving in the XY horizontal direction, and is required to be perpendicular to the optical axis of the microscope Z direction in the XY horizontal direction. |
XY Measurement StageClose Λ
| The XY measurement stage refers to the stage with a measuring mechanism in the XY horizontal direction, and it requires that the stage has relatively high accuracy. The stage not only has a flatness requirement on the surface, but also needs to ensure that in measurement the XY plane is always in a horizontal position during the movement. For the XY measurement stage, especially when observing and measuring the observed object beyond the field of view, the stage can be moved, and reading can be carried out through an externally attached measurement device to measure accurately large sized objects. XY Stage Measurement Method For XY measurements, a crosshair is required within the measurement field of view for aiming and positioning. The crosshair can be obtained by various means, generally on the eyepiece, using the preset reticle method, which is the simplest method. When using the monitor screen for measurement, a cross reticle can also be used, which is placed in the photographic eyepiece optical system. This method is simple and practical, the reticle is relatively clear, and various patterns of reticle can be used. It is also convenient to adjust the alignment angle of the reticle in the eyepiece. At present, more and more measurements use the crosshair function in the camera. The crosshairs are displayed by splicing the pixels of the same color, and even the color can be selected so that it is clearly distinguished from the background pattern, making the crosshairs more conspicuous and easy to operate. Some cameras have crosshairs that can also add multiple sets of lines, and can move horizontally and vertically so as to combine a variety of rectangular patterns of different sizes. One can apply and mark the position and size of the observed specimens. In industrial processing, it has the profilometer and projector functions. In addition to the camera to obtain the crosshair, there is also method of using a crosshair generator, display and other devices to obtain crosshair. During measurement, first place the object to be measured on the center position of the field of view of the stage, adjust the clear image, open the crosshair, and then move the object to be measured to the starting position to be measured, so that the center intersection of the crosshair is aligned with the said position, turn on the scale 0 position (or note the reading position), then move the object to be measured in the X or Y direction until the end point of the measurement position, then stops, and finally read through the measuring scale. Measurement error in XY horizontal direction During measurement, aim at the starting point of the object to be measured through the eyepiece or the cross positioning on the display, then move the stage, so that the stage is moved to the end point in the horizontal axial movement. At this time, it is necessary to ensure that the distance between the two points is the actual distance of the horizontal direction. If the stage is tilted, an angle is created between the horizontal direction and the tilted or oblique direction. The numerical value we read is actually the length of a diagonal line, thereby causing error. For XY stage measurement, it is necessary to use a high-magnification objective as much as possible. The objective lens has a certain depth of field. The smaller the objective lens is, the larger the depth of field will be. The large depth of field cannot reflect the image blurring conditions caused by the up and down misalignment when the stage moves horizontally: the bigger the objective magnification, the smaller the depth of field. When the stage is not flat and moves out of the depth of field range, the image will be out of focus and becomes blurred, indicating that the stage is in a non-horizontal position, and the accuracy of the measurement at this time will be higher. In principle, the depth of field range of the objective of the microscope is the minimum error range of the flatness of the platform stage. For XY horizontal measurement, when measuring objects with shorter lengths, this error is very small, even negligible. If the measured object is relatively long, the bigger the angle at which the stage is tilted, the greater the differential value between the oblique line of the measured image and the actual horizontal line segment of the object, and also the bigger the accumulated error will be. Because big stage has a bigger accumulated error, when measuring a relatively bigger length, it is necessary to calibrate the error within the stage system in advance. In measurement using computer software, the value of this accumulated error can be input into the measurement result for correction. Therefore, it must be ensured that the stage is always in a horizontal state in movement, which is the most basic requirement in optical measurement. Ways to adjust the level of the XY stage: 1. Use a cross reticle in the eyepiece or display. 2. Select an objective with the largest magnification in the microscope system, and place a calibrated line ruler on the stage (a long transparent glass ruler for calibration). The marked front of the line ruler is below the ruler, near the side of the stage countertop. 3. Overlap the starting point of the line ruler with the starting position on one side of the stage; adjust the focus, ensure that the objective is aligned with the starting position image of the line scale to obtain the clearest image. 4. Move the X direction of the stage, so that the stage moves along the direction of the line ruler, and at the same time observe whether the grid image of the line ruler is clear, and record the blurred position of the image until the end position. After completion, do the side of the Y direction. 5. Among the above results, the unclear position is the position where the stage is not flat. If the stage is unable to maintain horizontal, after the initial position is focus adjusted to get a clear image, the image will become more and more blurred, and in most cases, the stage is tilted to one side (up or down). To solve this problem, adjust the height of the four feet of the stage, or adjust the height position of the screws at the four corners of the bottom glazing of the stage center to keep the stage horizontal. In general, adjusting the stage horizontal can adjust the height of the position of the anchor screw of the stage, or use a very thin shim (Shim) to adjust. Sometimes, it is also necessary to adjust the perpendicularity of the optical axis of the microscope. Use the screw that fixes the microscope to top move the microscope, to make it shift in the vertical direction, keeping the microscope in a vertical position. Using a line ruler can also calibrate whether the distance traveled by the line ruler at each grid value for measurement is consistent with the distance read by the stage drive (for example, the reading from the micrometer or the digital display), thereby calibrating the error of the stage movement accuracy. Such errors are often caused by the empty return of the stage drive or the insufficient of stage stiffness etc. If line ruler is not used and the stage surface is observed directly, the above results can also be obtained. Also, when the stage surface is moved to each position, that whether the surface of the stage is uneven when processing can be displayed through clear or blurred image position, and can also observe whether the flatness of the stage plane itself is within the allowable range of the depth of field of the objective. |
Stage Backlight Window SizeClose Λ
| Stage backlight window size refers to the size of the window through which the transmitted light passes under the stage on the XY table plane of the stage. This window is usually covered with a piece of glass. For some stages with accuracy requirements in the XY horizontal direction, the horizontal plane of the glass can be adjusted by the height of the screws on the four corners below, and the consistency with the height of the stage plane is guaranteed. |
XY-Axis Measurement ModeClose Λ
| The XY-axis measurement mode refers to the way the scale used when measuring the XY axis of the stage. For different system, the choice is also different according to the different accuracy and operation requirements, such as mechanical micrometer, capacitance digital display, encoder and so on. |
XY-Axis ResolutionClose Λ
| XY-axis resolution refers to the minimum value of the measurement that the scale mechanism used can display when measuring the XY-axis. The resolution of the gauge refers to the scale value that can be read directly, also called the division value. For example, if the division value is 0.001 mm, that is, the resolution is 0.001 mm, and the numerical value of 0.001 mm can be read directly by the scale. |
XY-Axis Measurement Accuracy Close Λ
| The XY-axis measurement accuracy refers to the actually obtained measured value when measuring the XY axis. The accurate measurement value can be guaranteed within the range of plus or minus of this accuracy value. For example, if the measurement accuracy is ±0.002mm, the measured value of the spare part read is X, then the true value range of the part will be Minimum size: X - 0.002 Maximum size: X + 0.002 |
Digital Micrometer HeadClose Λ
| Micrometer head can be divided into mechanical micrometer and electronic micrometer. Electronic micrometer head is the micrometer head that displays the measurement results by numbers. When used in the platform, micrometer head has two functions, which can be used as a drive unit of the platform to displace the platform, and measure and read in the displacement. Digital micrometer head operation is more intuitive and convenient than traditional mechanical micrometer head, and has many auxiliary functions. 1. The readings are intuitive and accurate, avoiding errors that may be caused by inconvenient readings. 2. It is possible to set the relative 0 position at any position, so that the starting and ending points for measurement can be set freely to improve the efficiency. 3. Free switching between the metric and the British metric system. 4. The digital micrometer head can be equipped with a digital output adapter so that the measurement result can be directly input to a computer or a DRO (Digital ReadOut) to read and store data. |
PackagingClose Λ
| After unpacking, carefully inspect the various random accessories and parts in the package to avoid omissions. In order to save space and ensure safety of components, some components will be placed outside the inner packaging box, so be careful of their inspection. For special packaging, it is generally after opening the box, all packaging boxes, protective foam, plastic bags should be kept for a period of time. If there is a problem during the return period, you can return or exchange the original. After the return period (usually 10-30 days, according to the manufacturer’s Instruction of Terms of Service), these packaging boxes may be disposed of if there is no problem. |
| Contains | |||||||
| Parts Including | |||||||
| |||||||
| Packing | |
| Packaging Type | Carton Packaging |
| Packaging Material | Corrugated Carton |
| Packaging Dimensions(1) | 38x37x11.5cm (14.961x14.567x4.527″) |
| Inner Packing Material | Plastic Bag |
| Ancillary Packaging Materials | Sponge |
| Gross Weight | 2.91kg (6.42lbs) |
| Minimum Packaging Quantity | 1pc |
| Transportation Carton | Carton Packaging |
| Transportation Carton Material | Corrugated Carton |
| Transportation Carton Dimensions(1) | 38x37x11.5cm (14.961x14.567x4.527″) |
| Total Gross Weight of Transportation(kilogram) | 2.91 |
| Total Gross Weight of Transportation(pound) | 6.42 |


