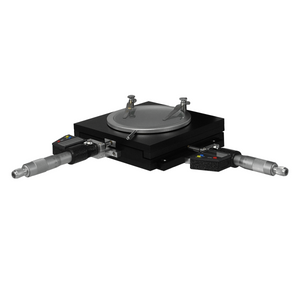
Quick Overview
Digital Micrometer Head Measurement Range: 0-25mm (0-0.984 in. ) . Digital Micrometer Head Resolution: 2μm. Mechanical Micrometer Head Graduation: 2μm.
MS24016101 25mm/1" Mechanical Micrometer Head
Mechanical Micrometer Head
| Digital Micrometer Head Measurement Range | 0-25mm (0-0.984 in. ) |
| Digital Micrometer Head Resolution | 2μm |
| Digital Micrometer Head Accuracy | 1μm |
| Digital Micrometer Head Spindle Diameter | Dia. 8mm |
| Mechanical Micrometer Head Graduation | 2μm |
| Surface Treatment | Polished Chrome |
| Material | Metal |
| Color | Black |
| Net Weight | 0.65kg (1.43lbs) |
Technical Info
Instructions
Mechanical Micrometer HeadClose Λ
| The micrometer head can be divided into two types: mechanical micrometer, and electronic micrometer. Mechanical type is a micrometer head that measures the length of displacement through the thread principle. When used in platform, micrometer head has two functions, one is to generate displacement as the drive platform, and the other is to measure the reading in the displacement. The mechanical micrometer head is a micrometer adjustment device that measures the length using the thread principle and has a measurement resolution of up to the micron level with an accuracy of 0.01 mm.. Mechanical micrometer head is also called micrometer head, spiral micrometer, micrometer. In experiment, micrometer head is a tool used to generate displacement and indicate the amount of the displacement. The mounting sleeve of the micrometer head is to facilitate fixed mounting on the stand base. The main ruler on the axial sleeve has two rows of scale lines: the row that is marked with number is the whole millimeter line (1mm/grid); the other row is the half mm line (0.5mm/grid); the circumferential surface of the front part of the micrometer tube is engraved with 50 equal mark lines (0.01 mm/gird). When the micrometer tube or the fine focus knob is rotated by hand, the measuring rod advances or retreats along the direction of the axis. For every 1 gird rotated by the micrometer tube, the measuring rod moves a small displacement of 0.01 mm along the axial direction, which is also called the graduation value of the micrometer head. The micrometer head reading method is to read the scale value exposed on the main ruler of the sleeve first, pay attention to the half-millimeter line; then read the numerical value on the micrometer tube aligned with the horizontal line of the main ruler, and 1/10 graduation can be estimated. |
PackagingClose Λ
| After unpacking, carefully inspect the various random accessories and parts in the package to avoid omissions. In order to save space and ensure safety of components, some components will be placed outside the inner packaging box, so be careful of their inspection. For special packaging, it is generally after opening the box, all packaging boxes, protective foam, plastic bags should be kept for a period of time. If there is a problem during the return period, you can return or exchange the original. After the return period (usually 10-30 days, according to the manufacturer’s Instruction of Terms of Service), these packaging boxes may be disposed of if there is no problem. |
| Packing | |
| Packaging Type | Carton Packaging |
| Packaging Material | Cardboard Box |
| Packaging Dimensions(1) | 20x9.5x8cm (7.874x3.740x3.150″) |
| Inner Packing Material | Plastic Bag |
| Ancillary Packaging Materials | Plastic |
| Gross Weight | 0.75kg (1.65lbs) |
| Minimum Packaging Quantity | 1pc |
| Transportation Carton | Carton Packaging |
| Transportation Carton Material | Cardboard Box |
| Transportation Carton Dimensions(1) | 20x9.5x8cm (7.874x3.740x3.150″) |
| Total Gross Weight of Transportation(kilogram) | 0.75 |
| Total Gross Weight of Transportation(pound) | 1.65 |
 |


