Quick Overview
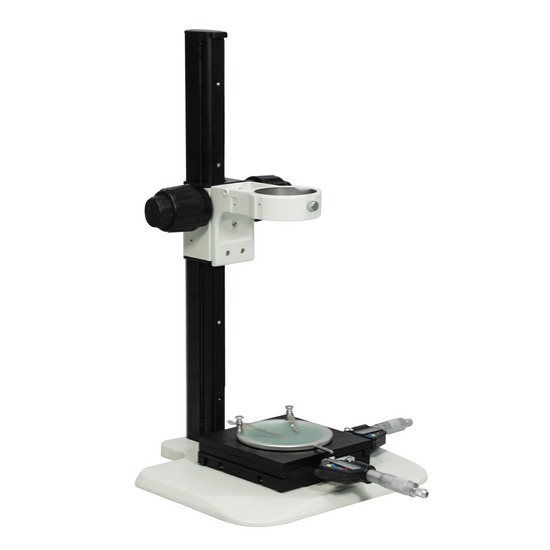
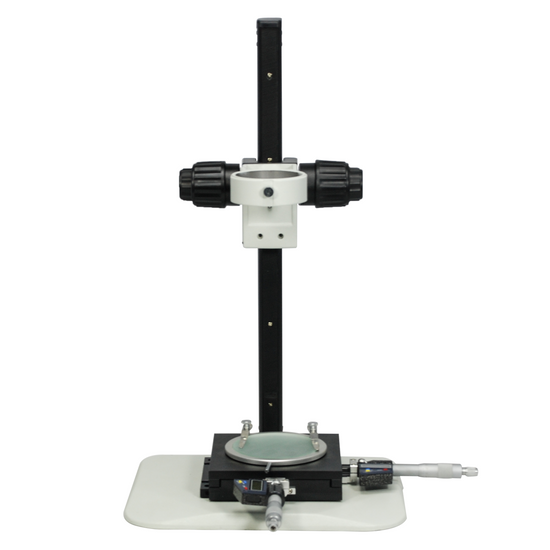
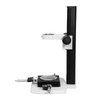
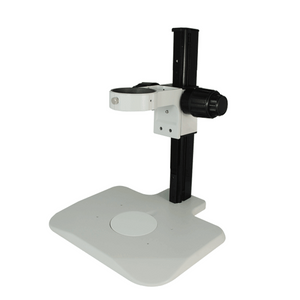
Track Stand. Dia. 76mm Scope Holder. Track Length: 520mm. Base Dimensions: 320x305x16mm. Focus Distance: 385mm. Black White Plate. Plate Size: Dia. 95x5mm. XY Stage Travel Distance: 2x2 in. XY-Axis Drive Mode: Manual. Stage Platform Dimensions: 150x150mm. XY-Axis Measurement Mode: Micrometer. XY-Axis Resolution: 1μm.
ST02041322 76mm Fine Focus Track Stand with Measurement Stage
Track Stand
| Stand Type | Track Stand |
| Holder Adapter Type | Dia. 76mm Scope Holder |
| Track Length | 520mm |
| Base Type | Table Base |
| Base Shape | Rectangle |
| Stand Throat Depth | 120mm |
| Base Dimensions | 320x305x16mm |
| Mounting Holes Position | 140x70mm |
| Mounting Hole Dimensions | M4 |
| Focus Mode | Manual |
| Coarse/Fine Focus Type | Coaxial Coarse/Fine Focus |
| Focus Distance | 385mm |
| Fine Focus Travel Distance | Same as Focus Distance |
| Coarse Focus Distance per Rotation | 23mm |
| Fine Focus Distance per Rotation | 0.56mm |
| Focusing Knob Tightness Adjustable | Tightness Adjustable |
| Surface Treatment | Spray Paint |
| Material | Metal |
| Color | White |
| Net Weight | 5.65kg (12.46lbs) |
| Dimensions | 320x305x536mm (12.598x12.008x21.102 in. ) |
Microscope Plate
| 95x5mm Black White Plate | |
| Plate Type | Black White Plate |
| Plate Size | Dia. 95x5mm |
| Material | Plastic (ABS) |
| Color | Black, White |
| Applied Field | For ST0201, ST0501, ST1901, ST0801, ST0802 Series Post Stand. ST0203, ST0204 ST0403 Series Track Stand |
XY Measurement Stage
| 2x2" XY Manual Measurement Stage (with 2 of Digimatic Micrometer Head) | |
| XY Stage Travel Distance | 2x2 in. |
| XY-Axis Drive Mode | Manual |
| Stage Platform Dimensions | 150x150mm |
| Stage Height | 36mm |
| Stage Backlight Window Size | Dia. 90mm |
| XY-Axis Measurement Mode | Micrometer |
| XY-Axis Resolution | 1μm |
| XY-Axis Measurement Accuracy | 0.001mm |
| Micrometer Head Mount Size | Dia. 11mm |
| Stage Bottom Mounting Size | Dia. 95mm |
| Number of Stage Clips | 1 Pair |
| Surface Treatment | Black Oxide Finish |
| Material | Metal |
| Color | Black |
| Net Weight | 2.10kg (4.63lbs) |
Digital Micrometer Head
| 25mm Digimatic Micrometer Head | |
| Digital Micrometer Head Measurement Range | 0-25mm (0-0.984 in. ) |
| Digital Micrometer Head Resolution | 1μm |
| Digital Micrometer Head Accuracy | 0.001mm |
| Digital Micrometer Head Spindle Diameter | Dia. 8mm |
| mm/inch Conversion | Yes |
| Zero-Setting | Yes |
| Data Output | Yes |
| Digital Micrometer Head Power Supply Type | Battery SR44 1pc |
| Surface Treatment | Polished Chrome |
| Material | Metal |
| Color | White |
Technical Info
Instructions
Microscope StandClose Λ
| Microscope stand have many options depending on the needs, especially stereo microscope stand, there are several factors to consider before choosing: Stability: microscope stand is used to prop up the microscope body. The stand should be selected according to the size of the microscope mainframe. The stability of the stand determines the stability of the microscope in use, and its various adapters and screws must be tightly locked. Volume size: limited by the working environment and space of the workbench. Workspace and scope: the size of the workspace of the object being observed and the height of the object being observed should be considered. Choice of lighting: some stands are equipped with a light source, but some are not, depending on whether there are conditions to add additional lighting. Operational requirements: 1. Install the stand as required. 2. Arrange a reasonable fixed position for the stand. 3. Carefully tighten the microscope mainframe. 4. Arrange the location of the additional light source reasonably, and place the electric wire in a position that does not interfere with the work. 5. Connect the various kinds of peripheral devices, such as cameras, monitors, computers and so on. |
Track StandClose Λ
| Throughout the focusing range, the track stand moves up and down along the guide rail through the focusing mechanism to achieve the purpose of focusing the microscope. This kind of structure is relatively stable, and the microscope is always kept moving up and down vertically along a central axis. When the focus is adjusted, it is not easy to shake, and there is no free sliding phenomenon. It is a relatively common and safe and reliable accessory. The size of the stand is generally small, flexible and convenient, and most of them are placed on the table for use, Therefore, together with the post stand, it is also called “desktop or table top stand". With regard to the height of the stand, most manufacturers usually do not make it very high. If the guide rail is long, it is easy to deform, and relatively more difficult . |
Dia. 76mm Scope HolderClose Λ
| The 76mm stand scope holder is the most popular microscope body adapter size, suitable for stereo microscopes produced by most manufacturers. Place the microscope body in a 76mm scope holder, tighten with screws to avoid shaking when the microscope is in use. Because this stand scope holder is very common, some special-sized microscopes can also borrow and use this stand, but only need a specific adapter to connect the microscope body with a diameter of less than 76mm. |
Stand Throat DepthClose Λ
| Stand throat depth, also known as the throat depth, is an important parameter when selecting a microscope stand. When observing a relatively large object, a relatively large space is required, and a large throat depth can accommodate the object to move to the microscope observation center. |
Coaxial Coarse/Fine FocusClose Λ
| Focus mechanism, the coarse / fine focus knobs are in a coaxial center position, they are connected together by a gear reduction mechanism, which can be coarse/ fine focus adjusted at any time during the entire stroke. Generally, the coarse focus diameter is relatively big, which is inside close to the body of the microscope, and the fine focus diameter is relatively small, which is outside of the body of the microscope. Coarse focus adjustment is used to quickly move to find the image, and the fine focus adjustment is used to finely adjust the clarity of the image. Generally, the minimum read value of the fine focus adjustment can be accurate to 1 micron, and single circle can reach a stroke of 0.1 mm. Mechanical fine focus plays a very important role in the accuracy of the microscope resolution. If the fine focus accuracy is not enough, or cannot be stabilized at the sharpest focusing position, the image will be out of focus and become blurred. The tightness of coarse focus is generally adjustable. Generally, on one side of the knob (usually on the right side), there is a textured knob on the inside of the coarse knob, which is tightened if rotated clockwise; and loosened if rotated counterclockwise. In the process of focusing, direct focusing should not be on the objective of high magnification; instead, find the object of low magnification first, and gradually adjust to high magnification. Usually, the coarse focus knob is rotated first, and when the objective lens is gradually lowered or the platform is gradually rising, find the object, and then adjust with the fine focus, until the object image in the field of view is clear. Generally, when changing from low magnification to high magnification objective, one only need to slightly adjust the fine focus knob to make the object image clear. During the process, the distance between the objective and the specimen should be observed from the side, to understand the critical value of the object distance between the lens and the specimen. When using a high magnification objective, since the distance between the objective and the specimen is very close, after the image is found, the coarse focus knob cannot generally be used, and the fine focus knob can only be used to avoid excessive distance of movement, damaging the objective and the slide or specimen. By using the characteristics of the fine focus, the height or thickness of the observed object can be roughly measured under the microscope, such as measuring the thickness of the cell or tissue, the thickness of the cover glass, and the thickness of small objects that cannot be measured by various conventional measuring instruments. Method of measurement: place the object to be measured at the center of the field of view of the stage. After the image is clearly focused, try to use the highest magnification objective as much as possible, and align the adapter of the top feature point of the object to be measured. After adjusting clear, record the position of scale of the fine focus knob. Then, move the objective down to the adapter of the lowest feature point of the object to be measured, and record the position of scale of the fine focus knob. Then, according to the above fine focus, record the number of rounds of movement, and based on the parameters of conversion of each round into stroke (see the microscope fine focus knob parameters), the number of rounds is converted into the total stroke, which is the height of the object to be measured. If it is repeated a few times for average, a more accurate measurement can be obtained. |
Focusing Knob Tightness AdjustableClose Λ
| Different microscope bodies, different human operations, and different requirements for observation and operation, all require adjustment of the pre-tightening force of the stand that support microscope body. Facing the stand just right, use both hands to reverse the force to adjust the tightness. (face the knob of one side just right, clockwise is to tighten, counterclockwise is to loosen) In general, after long-time use, the knob will be loose, and adjustment is necessary. |
Microscope PlateClose Λ
| According to different objects to be observed, the appropriate platen should be selected. The microscope plate materials include black and white, black and white finish; transparent glass, frosted glass, metal, etc. Standard stands are generally configured with a suitable microscope plate, but different plates may need to be purchased separately. Black and white microscope plate are made of general plastics, and the different backgrounds in black and white make the object more prominent. Finish microscope plate eliminates reflections during observation. Transparent glass plate is used when observing transparent or translucent objects, and the use of transmitted light source is to make the light penetrate the object to be observed as much as possible. Finish glass plate, with its rough glass surface, can make the transmitted light more uniform and create a diffusing effect, avoiding exposure of the light shadow of the filament directly onto to the observed object. Metal plate, relatively more solid, is more suitable when it is necessary to operate and cut. Microscope plate is generally round shaped, on one side of the base there is a spring clip. When installing, align the plate with the clamp and push it in, and then press down the other end, so that the plate is smoothly embedded in to the circular card slot of the bottom plate. When removing, grab the other end of the clip, push and lift up the plate. |
XY Measurement StageClose Λ
| The XY measurement stage refers to the stage with a measuring mechanism in the XY horizontal direction, and it requires that the stage has relatively high accuracy. The stage not only has a flatness requirement on the surface, but also needs to ensure that in measurement the XY plane is always in a horizontal position during the movement. For the XY measurement stage, especially when observing and measuring the observed object beyond the field of view, the stage can be moved, and reading can be carried out through an externally attached measurement device to measure accurately large sized objects. XY Stage Measurement Method For XY measurements, a crosshair is required within the measurement field of view for aiming and positioning. The crosshair can be obtained by various means, generally on the eyepiece, using the preset reticle method, which is the simplest method. When using the monitor screen for measurement, a cross reticle can also be used, which is placed in the photographic eyepiece optical system. This method is simple and practical, the reticle is relatively clear, and various patterns of reticle can be used. It is also convenient to adjust the alignment angle of the reticle in the eyepiece. At present, more and more measurements use the crosshair function in the camera. The crosshairs are displayed by splicing the pixels of the same color, and even the color can be selected so that it is clearly distinguished from the background pattern, making the crosshairs more conspicuous and easy to operate. Some cameras have crosshairs that can also add multiple sets of lines, and can move horizontally and vertically so as to combine a variety of rectangular patterns of different sizes. One can apply and mark the position and size of the observed specimens. In industrial processing, it has the profilometer and projector functions. In addition to the camera to obtain the crosshair, there is also method of using a crosshair generator, display and other devices to obtain crosshair. During measurement, first place the object to be measured on the center position of the field of view of the stage, adjust the clear image, open the crosshair, and then move the object to be measured to the starting position to be measured, so that the center intersection of the crosshair is aligned with the said position, turn on the scale 0 position (or note the reading position), then move the object to be measured in the X or Y direction until the end point of the measurement position, then stops, and finally read through the measuring scale. Measurement error in XY horizontal direction During measurement, aim at the starting point of the object to be measured through the eyepiece or the cross positioning on the display, then move the stage, so that the stage is moved to the end point in the horizontal axial movement. At this time, it is necessary to ensure that the distance between the two points is the actual distance of the horizontal direction. If the stage is tilted, an angle is created between the horizontal direction and the tilted or oblique direction. The numerical value we read is actually the length of a diagonal line, thereby causing error. For XY stage measurement, it is necessary to use a high-magnification objective as much as possible. The objective lens has a certain depth of field. The smaller the objective lens is, the larger the depth of field will be. The large depth of field cannot reflect the image blurring conditions caused by the up and down misalignment when the stage moves horizontally: the bigger the objective magnification, the smaller the depth of field. When the stage is not flat and moves out of the depth of field range, the image will be out of focus and becomes blurred, indicating that the stage is in a non-horizontal position, and the accuracy of the measurement at this time will be higher. In principle, the depth of field range of the objective of the microscope is the minimum error range of the flatness of the platform stage. For XY horizontal measurement, when measuring objects with shorter lengths, this error is very small, even negligible. If the measured object is relatively long, the bigger the angle at which the stage is tilted, the greater the differential value between the oblique line of the measured image and the actual horizontal line segment of the object, and also the bigger the accumulated error will be. Because big stage has a bigger accumulated error, when measuring a relatively bigger length, it is necessary to calibrate the error within the stage system in advance. In measurement using computer software, the value of this accumulated error can be input into the measurement result for correction. Therefore, it must be ensured that the stage is always in a horizontal state in movement, which is the most basic requirement in optical measurement. Ways to adjust the level of the XY stage: 1. Use a cross reticle in the eyepiece or display. 2. Select an objective with the largest magnification in the microscope system, and place a calibrated line ruler on the stage (a long transparent glass ruler for calibration). The marked front of the line ruler is below the ruler, near the side of the stage countertop. 3. Overlap the starting point of the line ruler with the starting position on one side of the stage; adjust the focus, ensure that the objective is aligned with the starting position image of the line scale to obtain the clearest image. 4. Move the X direction of the stage, so that the stage moves along the direction of the line ruler, and at the same time observe whether the grid image of the line ruler is clear, and record the blurred position of the image until the end position. After completion, do the side of the Y direction. 5. Among the above results, the unclear position is the position where the stage is not flat. If the stage is unable to maintain horizontal, after the initial position is focus adjusted to get a clear image, the image will become more and more blurred, and in most cases, the stage is tilted to one side (up or down). To solve this problem, adjust the height of the four feet of the stage, or adjust the height position of the screws at the four corners of the bottom glazing of the stage center to keep the stage horizontal. In general, adjusting the stage horizontal can adjust the height of the position of the anchor screw of the stage, or use a very thin shim (Shim) to adjust. Sometimes, it is also necessary to adjust the perpendicularity of the optical axis of the microscope. Use the screw that fixes the microscope to top move the microscope, to make it shift in the vertical direction, keeping the microscope in a vertical position. Using a line ruler can also calibrate whether the distance traveled by the line ruler at each grid value for measurement is consistent with the distance read by the stage drive (for example, the reading from the micrometer or the digital display), thereby calibrating the error of the stage movement accuracy. Such errors are often caused by the empty return of the stage drive or the insufficient of stage stiffness etc. If line ruler is not used and the stage surface is observed directly, the above results can also be obtained. Also, when the stage surface is moved to each position, that whether the surface of the stage is uneven when processing can be displayed through clear or blurred image position, and can also observe whether the flatness of the stage plane itself is within the allowable range of the depth of field of the objective. |
Stage Backlight Window SizeClose Λ
| Stage backlight window size refers to the size of the window through which the transmitted light passes under the stage on the XY table plane of the stage. This window is usually covered with a piece of glass. For some stages with accuracy requirements in the XY horizontal direction, the horizontal plane of the glass can be adjusted by the height of the screws on the four corners below, and the consistency with the height of the stage plane is guaranteed. |
XY-Axis Measurement ModeClose Λ
| The XY-axis measurement mode refers to the way the scale used when measuring the XY axis of the stage. For different system, the choice is also different according to the different accuracy and operation requirements, such as mechanical micrometer, capacitance digital display, encoder and so on. |
XY-Axis ResolutionClose Λ
| XY-axis resolution refers to the minimum value of the measurement that the scale mechanism used can display when measuring the XY-axis. The resolution of the gauge refers to the scale value that can be read directly, also called the division value. For example, if the division value is 0.001 mm, that is, the resolution is 0.001 mm, and the numerical value of 0.001 mm can be read directly by the scale. |
XY-Axis Measurement Accuracy Close Λ
| The XY-axis measurement accuracy refers to the actually obtained measured value when measuring the XY axis. The accurate measurement value can be guaranteed within the range of plus or minus of this accuracy value. For example, if the measurement accuracy is ±0.002mm, the measured value of the spare part read is X, then the true value range of the part will be Minimum size: X - 0.002 Maximum size: X + 0.002 |
Digital Micrometer HeadClose Λ
| Micrometer head can be divided into mechanical micrometer and electronic micrometer. Electronic micrometer head is the micrometer head that displays the measurement results by numbers. When used in the platform, micrometer head has two functions, which can be used as a drive unit of the platform to displace the platform, and measure and read in the displacement. Digital micrometer head operation is more intuitive and convenient than traditional mechanical micrometer head, and has many auxiliary functions. 1. The readings are intuitive and accurate, avoiding errors that may be caused by inconvenient readings. 2. It is possible to set the relative 0 position at any position, so that the starting and ending points for measurement can be set freely to improve the efficiency. 3. Free switching between the metric and the British metric system. 4. The digital micrometer head can be equipped with a digital output adapter so that the measurement result can be directly input to a computer or a DRO (Digital ReadOut) to read and store data. |
PackagingClose Λ
| After unpacking, carefully inspect the various random accessories and parts in the package to avoid omissions. In order to save space and ensure safety of components, some components will be placed outside the inner packaging box, so be careful of their inspection. For special packaging, it is generally after opening the box, all packaging boxes, protective foam, plastic bags should be kept for a period of time. If there is a problem during the return period, you can return or exchange the original. After the return period (usually 10-30 days, according to the manufacturer’s Instruction of Terms of Service), these packaging boxes may be disposed of if there is no problem. |
| Contains | ||||||||||
| Parts Including | ||||||||||
| ||||||||||
| Packing | |
| Packaging Type | Carton Packaging |
| Packaging Material | Corrugated Carton |
| Packaging Dimensions(1) | 64x42x25cm (25.197x16.535x9.842″) |
| Inner Packing Material | Plastic Bag |
| Ancillary Packaging Materials | Styrofoam |
| Gross Weight | 7.24kg (15.96lbs) |
| Minimum Packaging Quantity | 1pc |
| Transportation Carton | Carton Packaging |
| Transportation Carton Material | Corrugated Carton |
| Transportation Carton Dimensions(1) | 64x42x25cm (25.197x16.535x9.842″) |
| Total Gross Weight of Transportation(kilogram) | 7.24 |
| Total Gross Weight of Transportation(pound) | 15.96 |


